 |
DIY • Do it Yourself • Weekend Projects • BIG Projects • LITTLE Projects | |||||
|
DIY • Do it Yourself • Weekend Projects • BIG Projects • LITTLE Projects | |||||
How Do I Share My How-To?It's really pretty easy, pictures and videos of the steps it takes to complete your project are stored on YouTube and picasaWeb. Once your "final" video is stored on YouTube, your project will show in the listings on the site. All this is controlled by our Creator's Tools. Basically, you start a project by writing up the project idea. Step 1. Sign up for a free Creator's Account to gain access to the Creator's Tools. Step 2. Login Step 3. Push the "Create New Project" button on the Creator's Tools. Make a name (you can change it later) for your project. And describe your plans to use as notes to guide the creation of the steps. Step 4. When you've finished providing all the steps to your project, shooting the videos and saving to google video via the Creator's Tool Panel, you are ready to write the introductory paragraph with an interesting story of how you did it, or how you do it in the case of a professional services presentation. Step 5. Last but not least create and upload the video (to YouTube) which is the video that will be used to summarize the project. If you were building a robot, this final video would show the robot running around, doing fun things that will inspire others to create their version of your project. That's it... Watch the views and ratings for your project pile up along with the sales commissions! Or get a customer because you showed how you remodel a house. |
FAQ About Becoming A CreatorQ. Why would I go to all that work, building something, then put it on a website like C What I Can Do? What's the point? A. Actually, there are a couple of forms for a reward:
|
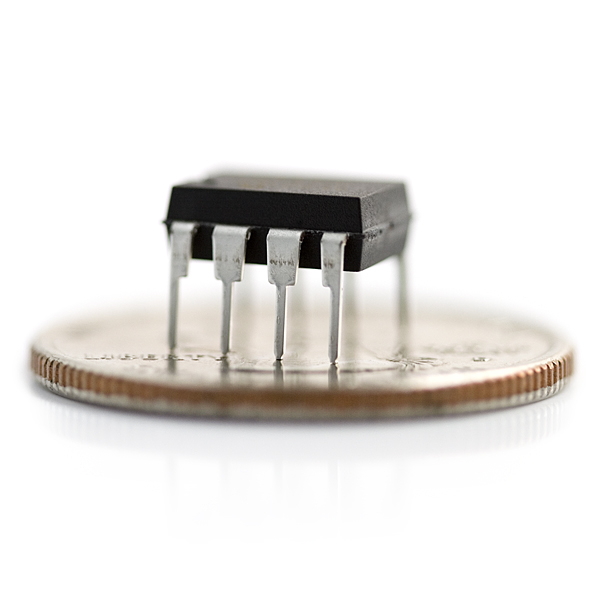
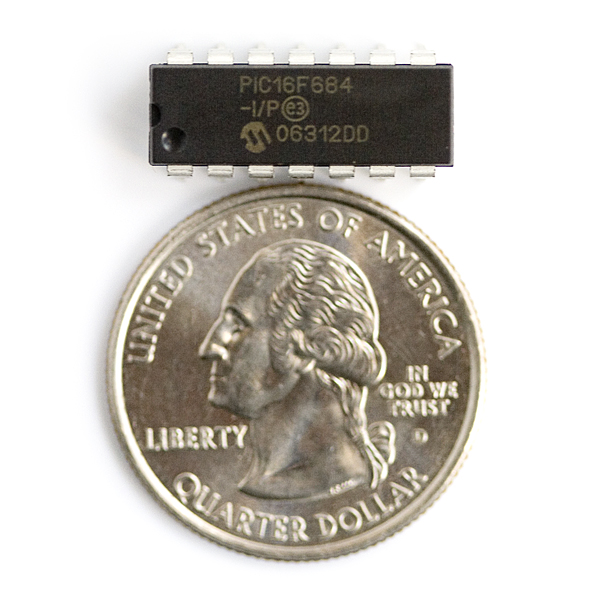
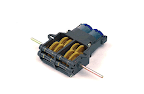
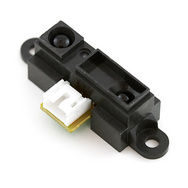
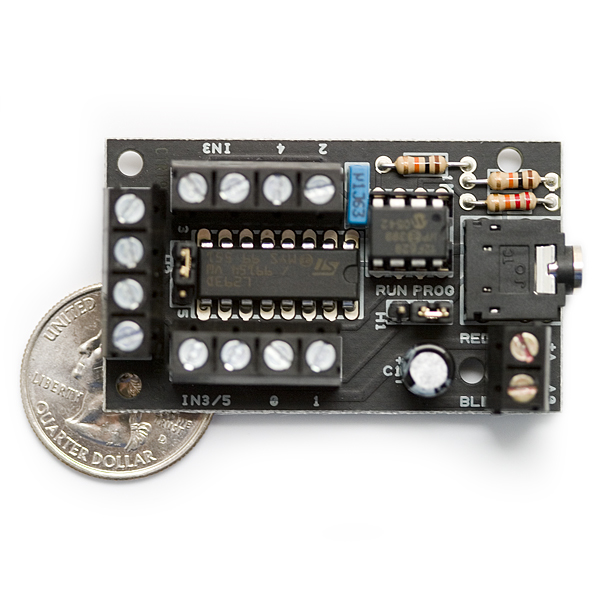
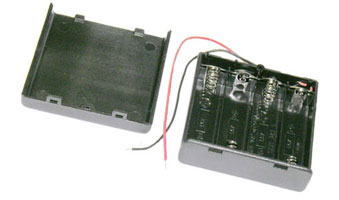
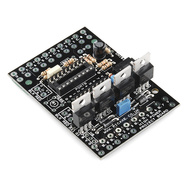
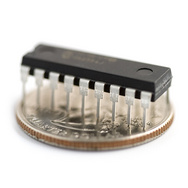
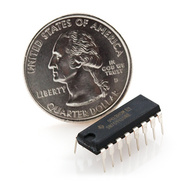
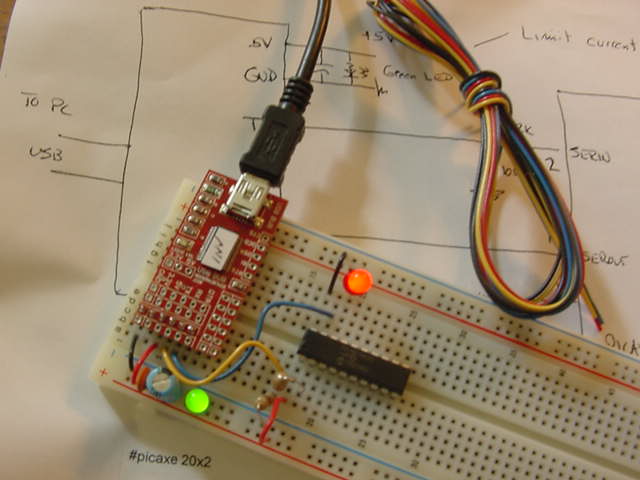
Arduino Development VS PicAxe Development ... 32021 Views Author's name: weRbots Here we take a look at the development boards available for creation of new fun designs. Yes, we hear all about Arduino and they ARE great with lot`s of developers creating lots of software. If you desire a lot of fancy interaction with a computer and screens that have dials and gizmos and widgets, then you just gotta go with Arduino, simply because of the software. The real "competition" if you care to call it that, is between the chips themselves. This boils down to PIC chips against Atmel chips. PIC chips generally speaking require a more technical approach and special programming tools. The compilers are not often simply free, so the investment is larger. Enter the picAxe chip. Here someone took a PIC chip and put a bootloader (like arduino) but just a little more... A BASIC interpreter! So you can hook up a PC as a terminal and program in BASIC. This makes experimentation much easier. When you want to drive a servo, you don`t have to find a C-Code group (a sketch), tweak it, then compile it. You simply set the servo up with the SERVO command, which starts the servo timer, then you SERVOPOS to put your servo where you want it. This is a disadvantage in some ways because it ties up timers, thus, you can`t just play a tune after issuing a SERVO or SERVOPOS command because the tune and the servo use the same timer. So if you want to play a tune while you drive, you`ll have to partition the code so you turn off the servo timers anytime you want to play a tune. A bummer, but it`s pretty easy to live with it because the offsetting benefits. ENTER PICAXE M2 parts: The game changer is the update to current picAxe M2 parts. Now you more than double the space available to a program, you have more pin versatility than ever before (meaning fewer restrictions of PWM outputs and all that). The M2 parts are pennies more expensive, but even allow running the chip (which requires no external crystal and glue parts like the Atmel) at up to 32 mHz! And one other feature: the M2 versions allow multi-threaded operation of up to four parallel processes to take place. Now you could run 4 robots at the same time, and they`ve cleaned up the timers a bit. You can get by with SERVOPOS commands in the middle of PWM commands without knocking the timing out of whack. This new set of features in the M2 parts can allow you to revisit some of the designs in this website to use more input and output pins and the additional lines of code to run more blinky lights and sensors on the same bot hardware. There`s more power in them there hills! So now the match between Arduino and PicAxe is very inviting. The point of this article is to chronicle my experience with the Arduino Uno development world and the picAxe development world. Let`s see what we are dealing with here in the old Arduino Uno VS picAxe M2 development systems. The Benchmark Test First object: Blink One LED. Blink a single LED on and off again. Here`s a hint, most UNO`s come with the light blinking. It`s the systems test program they load in. So this feat is easy for the Arduino Uno. Phil uses the same test for the picAxe. So when you plug in Phil`s board, you also get a single blinking LED. Second Test: Blink Ten LED`s in sequence. Easy peasy with Phil`s picAxe dev board. Not so easy to get ten grounds from an Uno. Not without either buying a pins-in breadboard for your Uno, or soldering iron and breadboard shield, but the soldering messes up the apples vs apples tests. In the picAxe development system from Phil - Ten LED`s or One LED are just as easy, just set 10 lines as outputs I used all 8 b0-b7 plus a couple of C-ports to make up ten pins, thus ten LEDs and Ten common wires plugged into the voluminous available ground pins. Which picAxe development tool I have spent a few dollars at Phil Anderson`s eBay site. Phil is a picAxe (and other) fan and has put together a development system for picAxe which is pretty impressive. First great point. Phil`s kit comes with a USB converter in the form of the USB Bub 2, from Modern Device which Phil runs through the FTDI programmer to properly "flip" the data so the picAxe can use it. No more trying to find USB/RS232 converters with the proper pinouts to work. Now the conversion is ready for use. Phil also includes the 10K/22K level conversion resistors so you can yank the USB adapter and go back to your old system any time you want. I never wanted to "go back" so I just pulled out the 10K and 22K parts completely since the USB BUB 2 is very compatible with picAxe pins. Bonuses with Phil`s setup: You get a 180pin breadboard, with your choice of picAxe M2 chip, I chose an 18M2, but bought a 20M2 chip so I could get a spare 18M2 and setup the system for the 20M2 which means I can plug in the 8pin 08M2, the 14 pin 14M2, or the 20M2 and all the pins match. Now I can just swap parts for 8, 14, or 20 pin setup because they are wired the same for power and serial communications. This is cool for the way I experiment: I can make an 08 circuit, decide to to more with it and swap in a 14 and drive more outputs or inputs with enough programming space to do some pretty impressive robotics work. Then there is the 20 chip which gives me extra pins and blinking, dazzling... I was even able to build my own Ultrasonic setup with a handful of parts and an ultrasound receiver and transmitter unit using picAxe 20M2. There was room left over to power a whole small robot along with creating my own Ping unit. Coolness. Which Arduino? Arduino represents a cool idea. And open source development environment - Open Source Hardware! That is pretty amazing and this has allowed many vendors to "roll their own" Arduino Uno. Even Radio Shack sells these things now, I think that`s pretty smart. The last time I visited Fry`s Electronics, I discovered they too have added Arduinos. Not just the Uno, but the whole open source hardware product line. So the cycle is complete. The Arduino is officially popular. But Wait - Jameco`s Arduino Solution And just like that, along comes Jameco Electronics with Phil`s picAxe development board only for Arduino. So this means there is now a best of both worlds approach. I gotta urge you to think about this approach because it will give you the flexibility of the advantages I`m touting for picAxe, only with Arduino. It will cost more than an Uno, but the potential for versatility is pretty off the charts. The hookup wire unlike in Phil`s version, is not supplied, it`s listed under components you will need. You have to get your own 830 point breadboard, and your own FTDI breakout board, and there are no extras like Phil`s extra rolls of #22 solid wire. But the basic parts are only $15, and the FTDI another $15, and a $6 cable, so you spend a little more $36 to get Arduino-ized. It seems like the best way to go. IF you are learning hacking your way to robot knowledge. If you have a project in mind, you can use an UNO with a proto board. Summary Arduino Uno VS picAxe M2 I`m gonna stick my neck out here. 1. I like, neigh Love, Arduino Uno. It`s hard to beat an Arduino Uno with an added proto-board. The great software is off the charts, and complex projects get easy. 2. Since the introduction of the M2 parts, you can`t beat a picAxe for lowest cost, electrically tough parts. 3. The new kid on the block uses a group of parts for creating an UNO using a pin-block and handful of glue parts. Now you have both the advantages of the picAxe dev system (lots of pins for experimenting). And the software for Atmel chips. I like this approach, though I haven`t tested it thoroughly just yet. I may leave that part up to you. It's Easy To: C - What - I - Can - Do • Sign up - Get ID and Password• Plan and Create a Project That Someone Might Enjoy and May Even Want to Build• Link to your creation on your favorite social networking site or blog.• Become famous! Because your projects get a lot of Hits!
|
By Creators DoctorZoidberg: Converting a Flashlight to LED DoctorZoidberg: Home Project: MUTE TV Wearable TV Muter! DoctorZoidberg: Scare Crow - For Modern Gardens - Home Project jim: CwhatIcanDo Website jim: Tour This Website PaulSandin: Butler, a low-cost mobile robot base WeRbots: BEAM BOT: HexBug Exposed! WeRbots: Buggy Bot: Wire Frame Bot Body WeRbots: Easy Cheap Robot Weekend Project WeRbots: RFL Robot Out Of The Box Experience WeRbots: Robot Man: With Robot Demos WeRbots: Build Your Own Track Drive Robot WeRbots: Build a Robot In 5 Minutes WeRbots: i-Mon App WeRbots: How To Make A Virtual Robot in FLASH WeRbots: Droid From Motorola :: A Robot ? WeRbots: Robots Almost Anyone Can Afford WeRbots: How To Build a Robot in a Box WeRbots: picAxe 18m2 for robotics WeRbots: Build a Respectable Autonomous Robot WeRbots: On Line Neighborhood Watch WeRbots: Pong))))) WeRbots: Roboteer`s Guide to BeagleBone Black WeRbots: Autonomous Robot PVC "Pickup Truck" |
By Keywords Action Script 2: How To Make A Virtual Robot in FLASH Ajax: CwhatIcanDo Website Ajax: CwhatIcanDo Specs: RC2 Ajax: battle Android: Droid From Motorola :: A Robot ? Android: battle batting cage installation: Home Installation of a 4 Section In-Ground Batting Cage BEAM Robots: BEAM BOT: HexBug Exposed! BEAM Robots: picaxe 8m: Wall Follower Mouse gets Majorly Modded BEAM Robots: How to build simple analog balancing robots BEAM Robots: battle Block Watch Cam: On Line Neighborhood Watch Cheap Robot: Easy Cheap Robot Weekend Project Cheap Robot: How To Build a Robot in a Box Cheap Robot: Autonomous Robot Built From Power Chair Wheelchair commercial killer: Home Project: MUTE TV Wearable TV Muter! Convert Your Flashlight to LED: Converting a Flashlight to LED Create a Project: HELP :: How To Create a Project CwhatIcanDo HELP: HELP :: How To Create a Project Do it Yourself: Robots Almost Anyone Can Afford Do it Yourself: Scare Crow - For Modern Gardens - Home Project Do it Yourself: Wheelchair Works 3 Ways: Manual, R/C, and Autonomous Do it Yourself: On Line Neighborhood Watch Droid Smart Phone: Droid From Motorola :: A Robot ? Easy to Make Robot: Easy Cheap Robot Weekend Project entertainment: Home Project: MUTE TV Wearable TV Muter! FLASH Applications: How To Make A Virtual Robot in FLASH HELP: Tour This Website How To: CwhatIcanDo Website How To Build Cheap Bots: Robots Almost Anyone Can Afford How To Build Cheap Bots: How To Build a Robot in a Box How To Website: Tour This Website How To Website: CwhatIcanDo Website Infrared Proximity Sensor: Build Your Own Track Drive Robot IR Detector: Build Your Own Track Drive Robot Lighting Projects: Converting a Flashlight to LED logic analyzer: An affordable Logic Analyzer for the workbench. multi: Multi Media Messaging Device Mute the TV: Home Project: MUTE TV Wearable TV Muter! open source: An affordable Logic Analyzer for the workbench. picAxe: Build Your Own Track Drive Robot picAxe: picAxe 18m2 for robotics picAxe 08m: Robots Almost Anyone Can Afford picAxe 14m: picAxe 14m Motor Driver Board: Make Your Own picAxe 14m: How To Build a Robot in a Box picAxe 18m2: picAxe 18m2 for robotics picAxe 18m2: Weekend Project: Get Started With Robots picAxe 18m2: Build a Robot From A Power Wheelchair picAxe 18m2: Autonomous Robot Built From Power Chair Wheelchair picAxe 18m2: Wheelchair Works 3 Ways: Manual, R/C, and Autonomous picAxe 18x: How To Build a Robot in a Box picAxe 18x: picAxe 18m2 for robotics picAxe 18x: Build a Robot From A Power Wheelchair power wheelchair: Wheelchair Works 3 Ways: Manual, R/C, and Autonomous Quick Build Robot: Build a Robot In 5 Minutes RFL Robots: Building an RFL Inspired Upright Robot Base RFL Robots: RFL Robot Out Of The Box Experience robot bending: Morphibian Land Shark robot bending: Build a Robot From A Power Wheelchair Robot Man: Robot Man: With Robot Demos Robot Motor Control: Build the L298 H-Bridge Motor Control Robot Motor Control: Robot Basics Robot Motor Control: picAxe 14m Motor Driver Board: Make Your Own Robot Motor Control: Buggy Bot: Wire Frame Bot Body Robot Motor Control: picAxe 8 bit Motor Controller: Look Inside Robot Motor Control: How to build simple analog balancing robots Robot Motor Control: Build a Robot From A Power Wheelchair Robot Motor Control: Autonomous Robot Built From Power Chair Wheelchair Robot Pets: DogBot the Robo Dog : Robotic WatchDog Robot Pets: Operation of the Tri-Bot From Wowwee! Robot Pets: Robot Man: With Robot Demos robotics: Droid From Motorola :: A Robot ? robotics: Easy Cheap Robot Weekend Project Robots: BEAM BOT: HexBug Exposed! Robots: Robot Basics Robots: Buggy Bot: Wire Frame Bot Body Robots: Build a Robot In 5 Minutes Robots: Build Your Own Track Drive Robot Robots: Easy Cheap Robot Weekend Project Robots: How To Build a Robot in a Box Rumble Bot Conversions: Robots Almost Anyone Can Afford Security System: On Line Neighborhood Watch Select or type in a Keyword: Converting a Flashlight to LED track drive robot: Build Your Own Track Drive Robot Virtual Pet Robot: How To Make A Virtual Robot in FLASH web: CwhatIcanDo Website web 2.0 site: CwhatIcanDo Website web 2.0 site: CwhatIcanDo Specs: RC2 Weekend Project Robots: Easy Cheap Robot Weekend Project Weekend Project Robots: Weekend Project: Get Started With Robots |
Click To Expand / Contract Menus. View by Creator, Category, Keywords or Number of Views.